
Composting is Simple, Learn the Basics
- Christine
- Jun 1, 2020
- 3 min read

Updated: Jun 7, 2020

We are all cooking at home more than usual, which provides the ideal start to a successful compost. That lettuce sitting in the back of the refrigerator, that is too wilted to eat now, doesn’t have to go to waste! WAIT - before we get into composting, let me share THE BEST vegetable saving hack of all time - submerge soft or wilted produce in an ice bath for 12-24 hours. This will extend the life of your produce by several days. If that doesn't save your lettuce and carrots, start a compost!
Composting is a great way to repurpose kitchen scraps into organic matter that's excellent for gardening while reducing your carbon footprint and waste. Here at Zeeta, we care deeply about sustainability and being kind to the environment. Homemade composted material is used in our very own garden, where everything from citrus fruits, herbs, and even the lavender used in our body oil and spray is grown. All you need to get started is a plastic bin, a screwdriver or drill and some kitchen scraps.
Here's how to start a compost in any size yard.
The Container
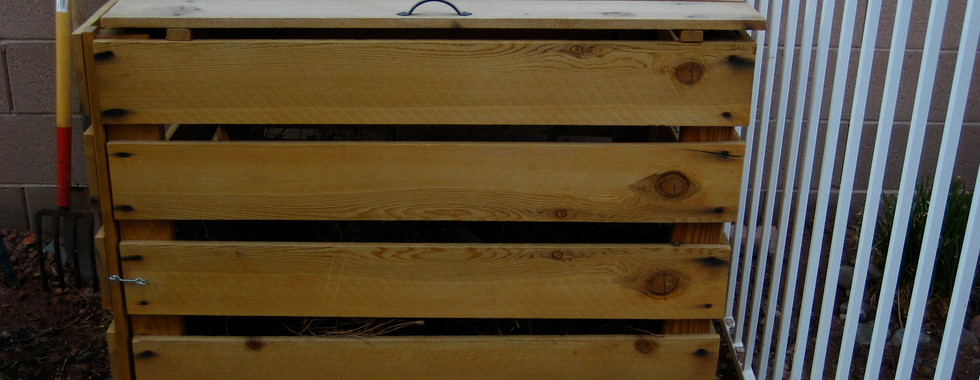
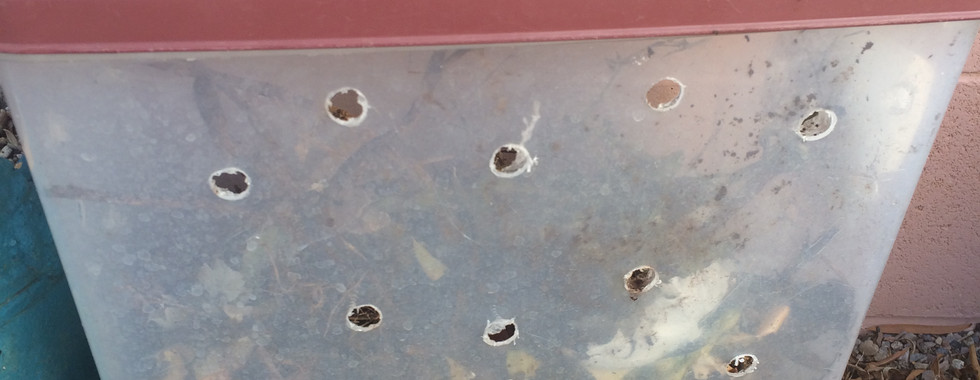
You can make your own compost bin or you can purchase one.
To make your own DIY compost bin, use a large storage “tote” container and drill aeration holes on the lid and around the sides. If you want to go big with your DIY bin, use an old pallet and a few hinges from your local hardware store.
Purchasing a compost bin is also an option, and something that's recommended if that route seems more logical to you.


The Material
A general rule of thumb for good compost is two parts “green” material to one part “brown” material plus water (if you live in a dry climate or haven't had rain in a while). Brown material is composed generally of clippings and organic material from your own garden and yard: think dead leaves, last year's annuals, and sticks to supply carbon to the compost. Avoid adding weeds and pet waste as these ingredients are no good for your compost!
Green material, on the other hand, supplies nitrogen and is generally made up of things from the kitchen, including fruits, vegetables, egg shells, coffee grounds, etc. and grass clippings.
Pictured here are some examples of “green” and “brown” materials collected for compost.
For green material, it is helpful to have some sort of storage container in the kitchen to store scraps and other material for the compost. We use a bowl and empty it daily or more often lately with all of the cooking and at-home eating. There are a number of creative ways to store this material in the kitchen and a variety of countertop or under the counter storage bins for purchase. The key is remembering to throw green material in the compost bowl instead of the trash!📷

Brown materials can be easily collected outside. This bucket was filled in under 5 minutes and is mainly composed of twigs, dead leaves, and fallen flower petals found in the yard. Brown material is most easily collected while doing a number of yard work related tasks such as raking leaves, trimming bushes and cutting grass. Toilet paper rolls work as brown materials too. I generally add one or two each week to my bin and break it into small pieces first to assist the process. 📷

Examples of compostable material: fruits and vegetables, eggshells, coffee grounds, tea bags, nut shells, brown paper materials, thin cardboard, yard trimmings, grass clippings (but not too much if you have a very large yard).
Examples of things NOT to compost: coal/charcoal, dairy products, meat/fish bones, fat/lard/oil, pet waste, weeds, diseased or insect ridden plants. For a full list, visit the EPA website.
The Procedure📷
It is generally recommended to mix one part brown material to two parts green material. Add water as needed to make sure the compost does not dry out. Here in the desert southwest, I spray my bin 4-5x each week. Be sure to mix the material frequently, at least once each week, supplying water when it is dry and adding new material regularly.
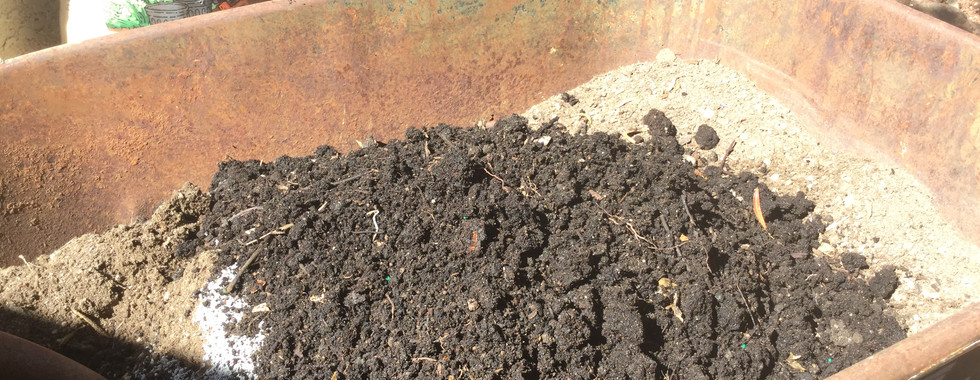
The End Result


It will take a few months before you have usable soil available, but it will be the darkest, most nutritious, rich soil to spread around your yard and gardens. Pictured here is the organic material after 8 months of starting the compost bin, ready to be used next planting season.
Happy Composting!
Reduce - Reuse - Recycle


Comments